Working with tables
The "Tables" area of the OE toolbar contains seven buttons which allow you to create and manipulate tables in different ways -
The "Table" button allows you to create tables:

The "Table" button
The "Insert row" button allows you to insert rows into a table. This button will become active when a table cell is selected.

The "Insert row" button
The "Insert column" button allows you to insert columns into a table. This button will become active when a table cell is selected.

The "Insert column" button
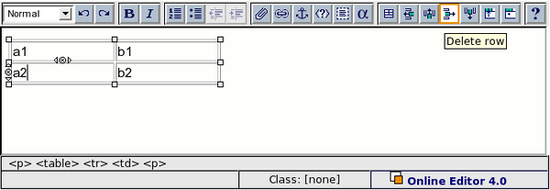
The "Delete row" button allows you to remove rows from a table. This button will become active when a table cell is selected.

The "Delete row" button
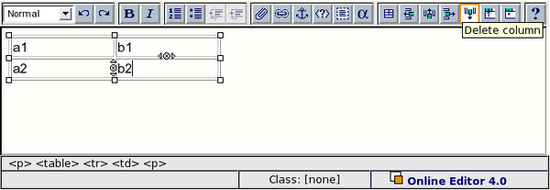
The "Delete column" button allows you to remove columns from a table. This button will become active when a table cell is selected.

The "Delete column" button
The "Split cell" button allows you to split a single table cell into two cells. This button will become active when a table cell is selected.

The "Split cell" button
The "Merge cell" button allows you to merge several table cells into a single cell. This button will become active when a table cell is selected.

The "Merge cells" button
When generating XHTML code, the system will use the "table" tag for tables, "tr" for table rows, "td" for table cells, "th" for table header cells. This behavior is controlled by the following templates:
- /design/standard/templates/content/datatype/view/ezxmltags/table.tpl
- /design/standard/templates/content/datatype/view/ezxmltags/tr.tpl
- /design/standard/templates/content/datatype/view/ezxmltags/td.tpl
- /design/standard/templates/content/datatype/view/ezxmltags/th.tpl
Creating a table
- Position the cursor at a location where you wish to insert a table.
Click the "Table" button. You can also right click and select "Insert table" from the context menu. You will see a modal dialog called "Insert table":
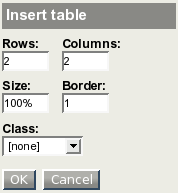
The "Insert table" dialog.
- Specify the number of rows and columns, the table width (either 0-100% or number of pixels), the table border (pixels), and optionally choose a class using the dropdown list.
Click the "OK" button. The table will appear in the OE text area. Please note that if the table border is 0 then the table will be displayed using red borders (as shown in the screenshot below).

Online Editor: if the table border is 0, the table is displayed using red borders.
- Insert the desired content into the table cells.
Please note that text and inline elements inside table cells will always be encapsulated by paragraphs (you'll see the "p" tag in the OE status bar) - however, the paragraph tags will not be shown when the Online Editor is disabled (when you're looking at the simplified XML). A single "p" tag inside a table cell will be omitted in the resulting XHTML code if you add the following line into the "[ezxhtml]" section of an override for the "settings/ezxml.ini" configuration file:
RenderParagraphInTableCells=disabled
This setting is enabled by default.
Selecting a table
If you click on the table border, the table will become selected and you will see it in a rectangular frame (as shown in the screenshot below). When using a Mozilla based browser you can also click somewhere inside the table.
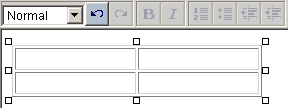
Online Editor: selecting a table.
Table properties
To edit the properties of a table, right click somewhere inside the table itself and select "Table Properties" from the context menu. You will see a modal dialog called "Table Properties":
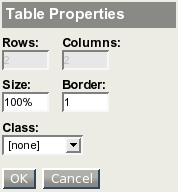
The "Table properties" dialog.
You can use this dialog to change the width (either 0-100% or number of pixels), the border (pixels) and the class. The "Rows" and "Columns" fields are disabled. If you need to change the number of rows and/or columns, you have to use the "Insert row", "Insert column", "Delete row", "Delete column" buttons.- Click "OK" when you're finished.
Cell properties
Right click somewhere inside a table cell and select "Cell Properties" from the context menu. You will see a modal dialog called "Edit Cell properties":
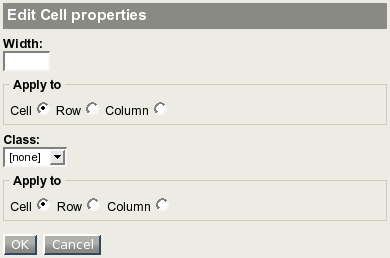
The "Cell properties" window.
You can use this dialog to specify the width (either 0-100% or number of pixels) and the class for the current cell. It is also possible to apply the settings to all the cells in the current row/column.
- Click "OK" when you're finished.
Creating a table header cell
You can transform table cells into a table header cells. Please note that this feature works differently in Internet Explorer and Mozilla based browsers.
Internet Explorer
Internet Explorer allows you to transform single cells to header cells. Right click somewhere inside the target cell and choose "TH" from the context menu:
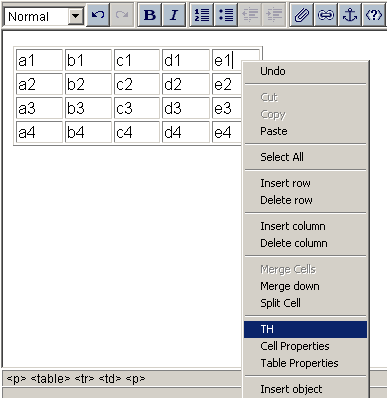
Online Editor: transforming single cells to header cells.
The cell will become a header cell:
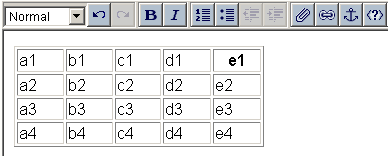
The table cell that has become a header cell.
If you want to transform it back, simply right click inside the cell and select "TH" from the context menu.
Mozilla
You can not transform a single table cell into a table header cell but the transformation is possible for all the cells inside the selected/current row. Right click on the target row and choose "Change To TH" from the context menu:
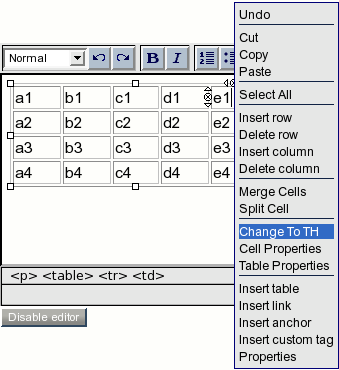
Online Editor: transforming all the cells in the row to header cells (Mozilla).
The row will become a table header row (containing only header cells):
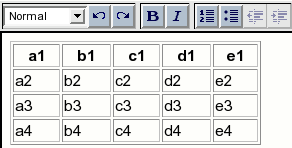
The row that has become a table header row.
If you want to change it back, right click on a table header and choose "Change To TD" from the context menu.
Classified header cells
When using a Mozilla based browser, you can specify a "class" parameter for a header cell. Please note that this functionality is not available when using Internet Explorer.
- Right click somewhere inside the header cell and choose "Properties" from the context menu. A modal dialog will appear.
- Select the desired class name from the dropdown list and click the "OK" button.
Nested tables
It is possible to have tables inside other tables. This can be done by inserting a table into an existing table cell.
- Position the cursor inside the cell where you wish to insert a new table.
- Click the "Table" button. You will see a modal dialog called "Insert table".
Specify the properties and click the "OK" button. A new table will appear inside the table cell:
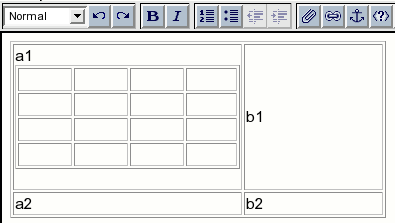
Adding a new table inside the existing one.
Removing a table
When using Internet Explorer, you can remove an entire table by right clicking on a selected table and choosing "Delete" from the context menu. When using a Mozilla based browser, you can remove the entire table by deleting all its rows/columns.
Inserting a new row
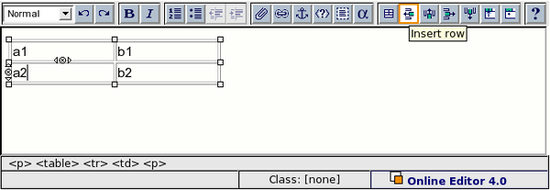
Put your mouse cursor inside one of the table cells (the status bar will show the tags for the current cell) and click the "Insert row" button:
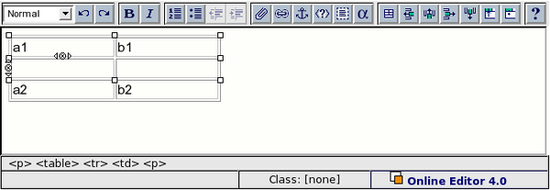
A row will appear above the current cell:
You can also insert a row by right clicking on a table cell and choosing "Insert row" from the context menu.
Inserting a new column
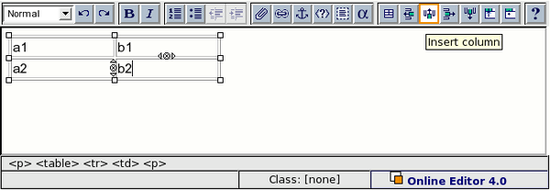
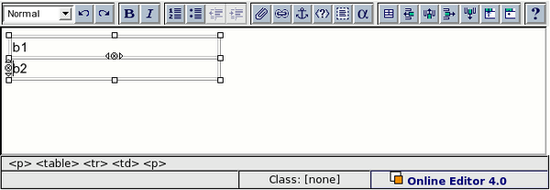
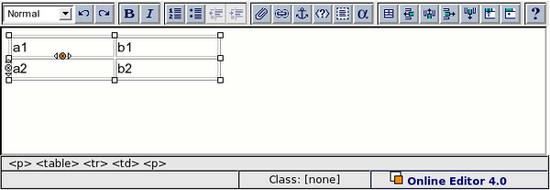
Put the cursor inside a table cell (the status bar will show the tags for the current cell) and click the "Insert column" button.
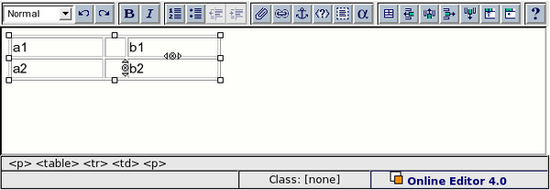
A new column will appear to the left of the current cell:
You can also insert a new column by right clicking on a cell and choosing "Insert column" from the context menu.
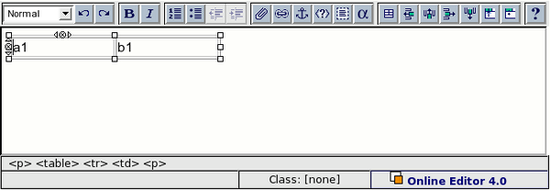
Removing a table row
- Put the cursor inside a table cell (the status bar will show the tags for the current cell).
You can also remove a row by right clicking on a cell and choosing "Delete row" from the context menu.
Alternate solution for Mozilla users
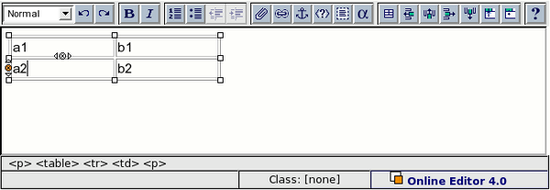
Removing a table column
- Put the cursor inside one of the table cells (the status bar will show the tags for the current cell).
You can also delete a column by right clicking on a table cell and choosing "Delete column" from the context menu.
Alternate solution for Mozilla users
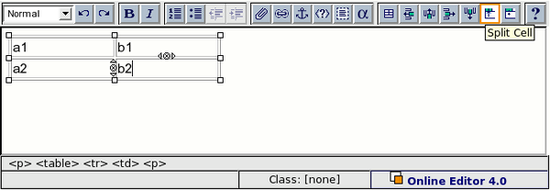
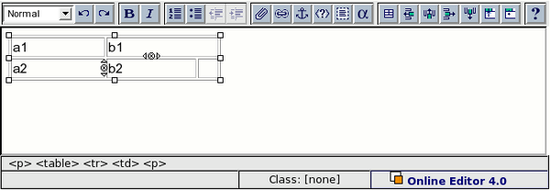
Splitting a table cell
- Position the cursor inside the cell you want to split (the status bar will show the tags for the current cell).
Merging table cells
It is possible to merge multiple table cells into one. Please note that this feature works differently in Internet Explorer and in Mozilla based browsers.
Internet Explorer
There are two ways to merge table cells: horizontally or vertically. Horizontal merging allows you to combine several non-empty table cells located in the same row. Vertical merging allows you to merge the current cell with its bottom neighbor. This means that you can merge two empty or non-empty cells located in the same column.
Horizontal merging
Select two or more non-empty cells in the same row and click the "Merge cell" button:
The selected cells will be merged into one cell containing all their content:
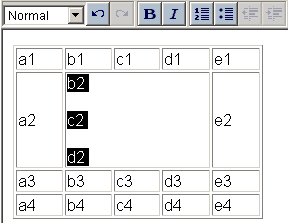
Online Editor: horizontal merging done.
You can also right click on the selected cells and choose "Merge Cells" from the context menu.
Vertical merging
Right click on the cell and select "Merge down" from the context menu:
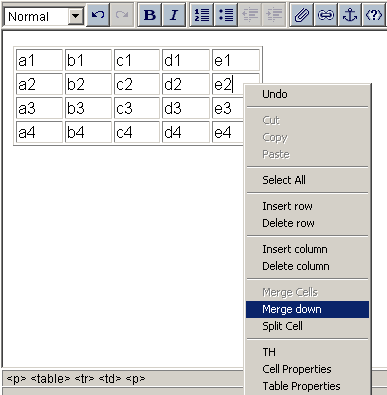
Online Editor: use the context menu for vertical merging.
The cell will be merged with the next cell in this column. The content of these two cells will be inserted into a new cell:
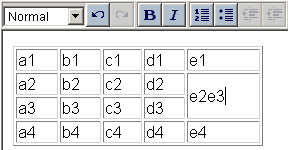
Online Editor: vertical merging done.
Mozilla
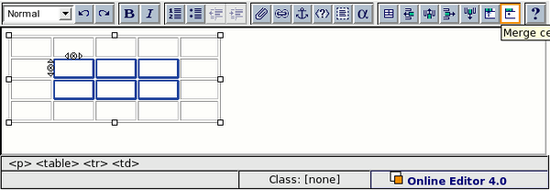
Select the cells you want to merge (the selected cells must be empty):
Click the "Merge cell" button.
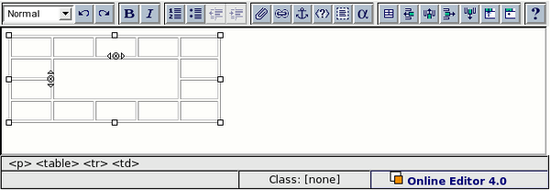
The selected cells will be merged into one cell:
You can also right click on the selected cells and choose "Merge Cells" from the context menu.
Svitlana Shatokhina (21/12/2005 3:44 pm)
Ole-Morten Halvorsen (18/01/2007 9:18 am)


Comments
There are no comments.